Ubuntu Server 20.04 comes with a new automated OS installation method called autoinstall. It is a replacement of the debian-installer (preseed). Overall, it is a better system that removes the headaches of using commands to interact with a GUI based installer.
Update: The AutoInstall documentation provided by Canonical has become much better now. Please consider using that as a resource too.
Overview
- Get the Ubuntu Live Server ISO file.
- Prepare the autoinstall configuration file.
- Prepare the boot commands.
Prepare autoinstall configuration file
In this automated Ubuntu installation, I uses cloud-init’s nocloud-net datasource provider to fetch the autoinstall configuration file from an HTTP server.
The nocloud-net datasource provider looks for three files, meta-data , user-data and vendor-data file at the URL path provided to the seedfrom variable.
autoinstall ds=nocloud-net;seedfrom=http://repo/files/ubuntu2004/In this automated Ubuntu OS installation the meta-data and vendor-data files are not particularly needed, but it must be present at the URL path; basically an empty file. The user-data file contains the meat and potatoes of the autoinstall configuration.
Hint: Run python -m SimpleHTTPServer 8080 to serve the static files on a desired port. In Python 3, it is python3 -m http.server 8080.
Example autoinstall user-data file
Autoinstall gotchas
- The comment line
#cloud-configis important. - It’s best to stop the SSH service in the installer environment. Leaving it enabled can confuse packer into initiating SSH connection and failing the packer build after 10 failed attempts.
- I’ve setup early commands to update the hostname during the installation. Otherwise the installer environment defaults to a hostname called
ubuntu-server. - The
username: rootis not supported in theidentitysection. - In the
late-commandssection, allows the ubuntu user tosudowithout a password. This will make ansible playbooks a little simpler. - In the
late-commandssection, if you update thegrubfile, make sure to runupdate-grub2in the target filesystem afterwards. Thecurtincommand needs to have a--target /target.
Preparing your boot commands for automated OS installation
Interrupt into the GRUB menu by tapping Shift key.
- At language selection click Enter key for the default English selection.

Edit the default boot commands by hitting F6, followed by Esc key. At this point your cursor will be at the end of the default boot commands.
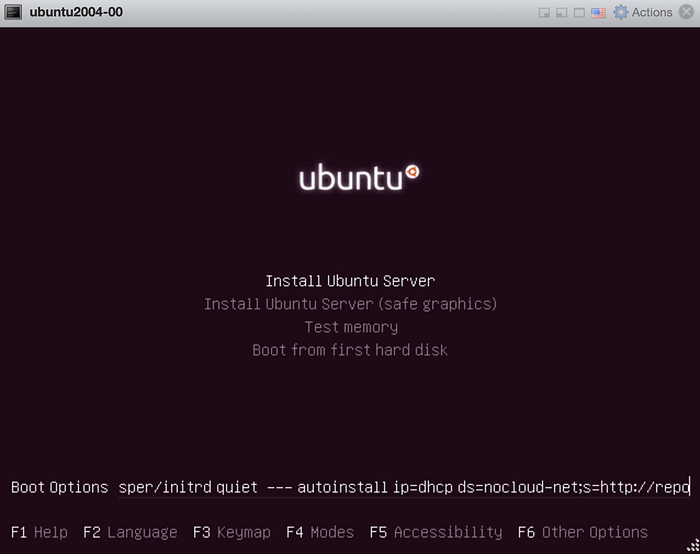
autoinstall net.ifnames=0 biosdevname=0 ip=dhcp ds=nocloud-net;s=http://repo/files/ubuntu2004/The autoinstall keyword is needed for the Live Installer to select the autoinstall method.
net.ifnames=0andbiosdevname=0is needed to revert the OS naming of interface names to oldereth0,eth1formats.ip=dhcpenables the use of DHCP during the automated OS installation.ds=nocloud-net;seedfrom=<url>is the cloud-init datasource options for nocloud-net. Theseedfromurl’s trailing slash is important because cloud-init’s nocloud-net datasource does not prepend the forward slash when requesting the meta-data and user-data files on the web server.

Notes
The Ubuntu Live Server ISO is too fast for Hashicorp Packer
I use a utility called Packer by Hashicorp to automate the entire VM building process.
I ran into some difficulty where packer’s boot_command arrives too late and the Ubuntu Server ISO had already initiated the interactive installer.
I settled on creating an iPXE ISO which drops into an iPXE shell, where I can allow packer to enter the appropriate commands and launch an iPXE script via HTTP.
# request DHCP IP address
# chain load an iPXE script located on an HTTP serverdhcp && chain http://repo/files/ubuntu2004/ubuntu2004.ipxe
The iPXE ISO can be found here: https://github.com/tlhakhan/ipxe-iso
In the iPXE script I have the freedom to configure the exact boot arguments to the installer.
Here is the git repository I use to maintain my home lab’s VM build workflow: https://github.com/tenzin-io/vmware-builder